
Last updated on July 21st, 2026 at 01:50 am
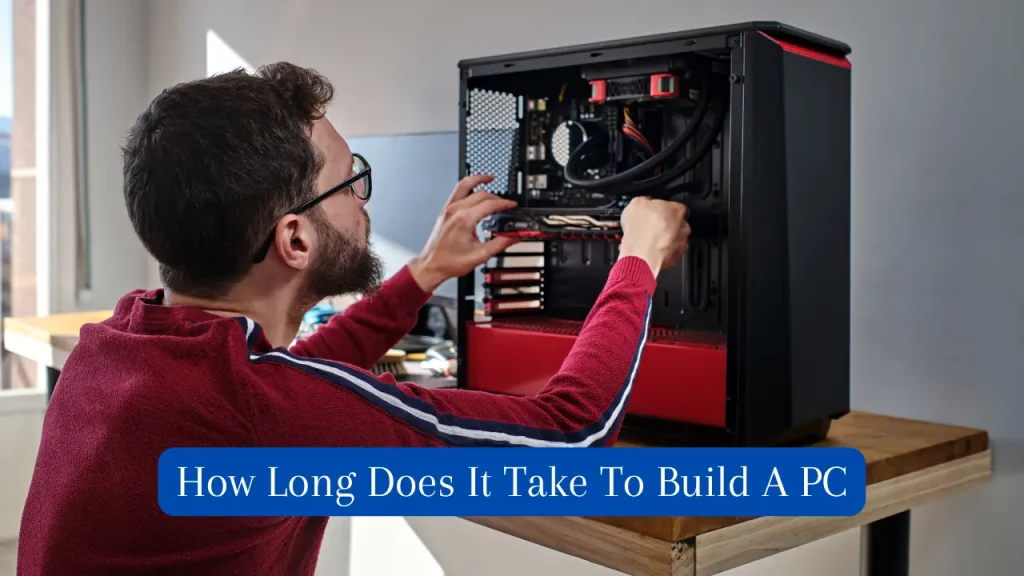
While building your own PC from scratch can be a satisfying and entertaining experience, many gamers are turned off by the thought of doing so because they aren’t sure how long does it take to build a PC.
Assembling a computer from scratch To installing Windows can take anywhere from a few minutes to several hours, depending on the expertise of the computer builder.
Building a computer from scratch can be a lengthy task. It needs planning, research, and careful installation.
Every step of the computer assembly process will be timestamped, and we’ll go over several efficient methods for building a PC that will have it up and running in no time.
We’ll talk about the tools and equipment you’ll need and how they might affect the time it takes to build. We’ll also consider the ongoing maintenance and upgrade needs of a PC.
Here is a breakdown of how much time everything takes when building a PC:
- Planning & Research (Depends on you)
- Gathering Parts (Can Take Several Weeks, depending on your sources)
- Assembly (Can take minutes to several hours)
- Installing Fans and Configuring Airflow (Can take up to 20 minutes)
- Installing Liquid Cooling (Can take up to an hour)
- Testing & Debugging (Depends on you)
- Installing the Operating System (Can take several minutes)
How Long Does It Take To Build A Computer?
As a general rule, building a PC from scratch can take a few hours if you already have all the parts you need. Also, the time it takes to build your PC depends on your experience, the complexity of the case, and the number of parts that need to be installed.
Planning & Research – Few Weeks
Planning and Researching before starting building a PC from scratch is crucial.
The amount of time required for planning and research before building a gaming PC can vary depending on a variety of factors, such as the level of expertise of the builder, the complexity of the build, the budget, and the desired performance of the system.
However, as a general rule, it’s recommended to spend at least a few weeks researching and planning before building a gaming PC.
This part could be very time-consuming, depending on how much detail you go into.
Consider researching what kind of motherboard and processor combination is best for your needs and any additional features like built-in Wi-Fi or Bluetooth capabilities.
You can use some help from some of the top forums on internet where user will help in selecting best pc hardware for your build . Some of the top sub-reedits are :
Moreover, you need to keep in mind your budget. Decide how much money you will spend on your build and look for components that fit those parameters.
Finally, it’s important to read reviews of the parts you plan to buy. This can help ensure that you get quality parts worth their price tag. And make sure you buy your components from trusted sources.
Gathering Components & Parts
Once you’ve planned your setup and done your Research, it’s time to start gathering components.
Depending on how quickly parts arrive, this can take anywhere from a few days to weeks. Make sure to factor in shipping times when ordering online, as they may take longer than expected.
Consider the cost of any additional tools or equipment needed for assembly.
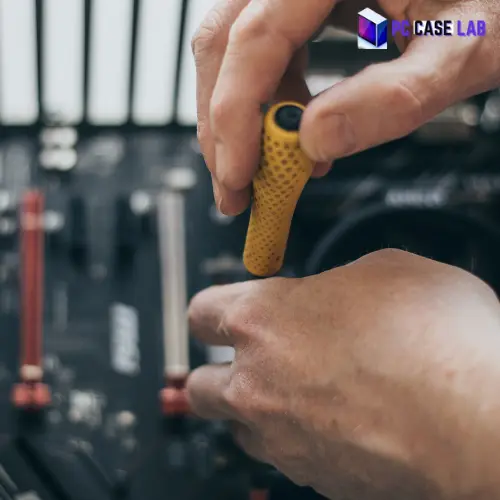
Some basic items include an anti-static wrist strap, Ltt screwdrivers, pliers, and cable ties. These are all relatively inexpensive but necessary for properly installing components into the case.
Assembly Of Computer

Not sure which case you’re working with? Here’s how to check before you start.
Now that you have all the parts and tools needed to build a PC, it’s time to move on to assembly.
This process can be quick, depending on your experience level.
First-time pc builders may take several hours or more, while an experienced builder could finish in just a few minutes.
The most important thing is to be careful and methodical when putting everything together; check for compatibility issues between pc components or potential obstructions caused by cables or other piece of hardware.
Take your time and double-check every connection before moving on to the next step.
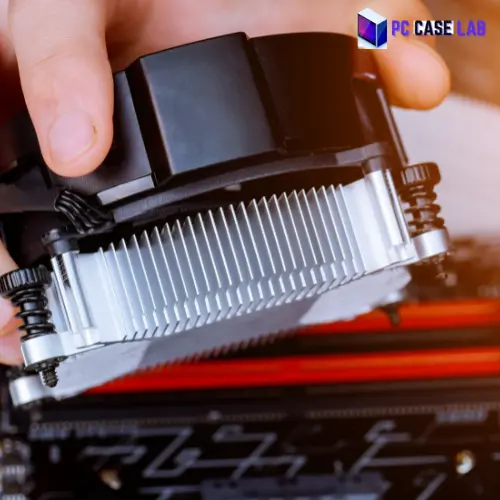
Ensure that you install your processor on the socket properly. Moreover, apply the required amount of thermal paste on the processor before installing the heatsink.
If you have a motherboard with RGB lighting, plug in the cables correctly and test that all the lights work properly.
The assembly of PC components is the most crucial part. It is recommended to take your time and seat everything properly.
Moreover, remember that you might have to take out everything again during the testing phase. So, wait to go all in on the cable management.
Here is a list of things that you need to do in the Assembly Phase:
- Unpacking components: The time required to unpack and organize all components, including the motherboard, CPU, GPU, memory, storage, and other pc components.
- Preparing the case: The time required to prepare the case, including installing standoffs and mounting the motherboard.
- Installing the CPU and cooler: The steps involved in installing the CPU and cooler include applying thermal paste and securing the air cooler to the socket.
- Installing memory and storage: The steps involved in installing memory and storage include identifying the correct slots and securing the modules and drives.
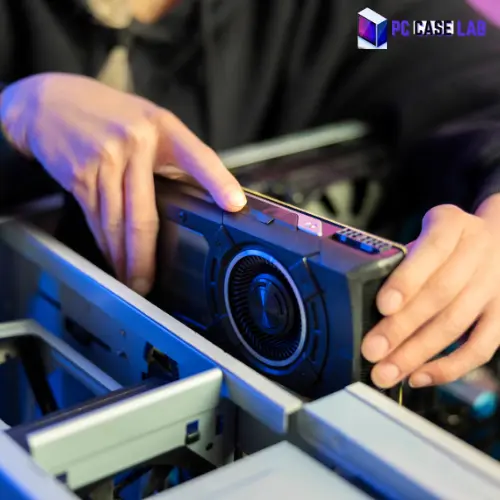
- Installing the GPU: The steps involved in installing the GPU include securing the card in the PCIe slot and connecting power cables.
- Connecting front-panel headers and cables: The time required to connect front-panel headers and cables, such as power buttons, USB ports, and audio headers.
- Connecting power supplies: The steps involved include plugging in the ATX power connector and securing power cables to the pc components.
- Cable management: The time required to route and secure cables within the case to promote proper airflow and aesthetics.
Ensure you have properly installed storage devices, PSU, GPU, and CPU before moving on to the testing phase.
Installing Fans & Radiators – 15 To 30 Mins
Next, you must install any fans or radiators your build requires.
This is usually done after the components are installed in the case, as it’s easier to access the mounting points for these items once everything else is in place.
Installing a single fan in a PC can take around 10-15 minutes for someone with experience, while installing a radiator can take around 30-45 minutes.
If multiple fans or radiators need to be installed, or if there are any complications with the installation process, it could take longer.
Refer to the manufacturer documentation for properly installing any type of cooling system components and double-check all connections.
Some of the cases does comes with already installed fans which saves a tons of time.
It’s also important to ensure that all fans are spinning properly before moving on.
Installing Liquid Cooling – 20 To 30 Mins
This process will add time to your build if you have opted for liquid cooling. Installing a water cooling loop can be tricky and requires some knowledge of the system’s components.
It’s important to take extra care when installing tubing, pumps, water blocks, and reservoirs. Any leaks or building mistakes in installation could cause damage to other components or even the entire system.
Ensure that all connections are secure before filling up the loop with coolant.
Moreover, seeking expert advice and guidance is recommended for a new PC building. Liquid cooling can be disastrous to your build if not done properly.
Therefore, take your time with it and do everything properly.
Installing RGB Lighting – 20 To 30 Mins
If your PC build includes RGB lighting, then this should be done last. To work correctly, the RGB controller must be attached directly to a fan or radiator.
Once all lights are connected, test that everything works properly and adjust any settings, such as colour or brightness, if necessary.
It’s also important to ensure that the cables from each light are tucked away neatly inside the case so they don’t interfere with airflow or obstruct other components.
Testing & Debugging – 1 Hour To 3 Hours
Once you have finished assembling the PC, it’s time to test that everything works correctly. This can be done by turning on the power switch and ensuring all components are powered up.
You may also need to enter BIOS or UEFI settings to ensure they’re properly configured. After getting into the BIOS settings, check every component you’ve installed. Like the processor, RAM, and storage devices.
Make sure everything is working in the correct order.
If something isn’t working as expected, you’ll need to do some debugging. This could include checking connections and ensuring proper compatibility between hardware components.
If they weren’t secured correctly during assembly, it might require reseating parts like RAM or a graphics card.
Remember that testing a new build can also take a lot of time if something needs fixing. You’ll need to check everything to find the root cause of the issue.
Once everything is in working order, you can move on to the next step.
Moreover, now you can manage your cables properly. Ensure all the cables are properly routed and organized, so they don’t obstruct airflow and look clean.
You can place the excess cables behind the case away from the open eye.
Well managed cables will make your system look neat and well-built, but the cables can take time if you are a beginner.
Installing The Operating System – 10 To 20 Mins
Once everything works as expected, it’s time to install the operating system. This could be Windows or Linux, depending on your preference.
Installation of an OS will require a valid license key and can take anywhere from 20 minutes up to several hours, depending on your internet connection speed. Or, if you are using a Bootable Drive, installing Windows OS on SSDs and M.2 drives can take several minutes.
After installation, you’ll need to do some basic configuration, such as setting up user accounts and installing necessary drivers for hardware components like graphics cards or sound cards.
Moreover, you’ll need to install other Utility software like a Browser, MSI-Afterburner (or any other testing software), or Benchmarking software.
You can also install Anti-Virus software if you are using Windows OS.
After installing all the necessary software, you need to test your hardware. Do keep in mind that constantly checking the temperatures of your newly built PC is crucial.
If temperatures are rising too much, you must reconsider your hardware configuration or the temperature control inside the case.
Now, your PC is ready to use if everything is working properly.
Maintenance & Upgrades
PC building is not the end of the story. You must constantly check for any updates or patches that could improve your system performance.
You can also upgrade some components, such as graphics cards, CPU coolers, RAM, etc. However, these upgrades usually require advanced knowledge of computers to be done properly.
Upgrading and Increasing the amount of RAMs and Storage devices in a system after completing the build is most common.
Moreover, it would be best if you regularly clean your PC. This means cleaning the dust out of PC fans, cases, and heatsinks, as this will ensure proper airflow in your system. You can use a vacuum cleaner or compressed air cans to do this job easily and quickly.
Regular maintenance on your PC can significantly extend its life expectancy and maintain optimal performance.
Required Tools & Equipment
The most important tool you’ll need is a screwdriver with different sizes of heads for the screws that come with your case and other components. (LTT Screwdriver Recommended)
An anti-static wristband or mat can also help prevent static electricity from damaging your precious parts.
Factors That Affect The Build Time
Conclusion
Assembling a gaming PC can take upto 2-3 Hours for beginners. However, with enough preparation and Research, making your machine in a reasonable amount of time is quite achievable.
There is no rush, and it can be quite a rewarding experience once you get your system up and running.
Contact a professional for assistance if you need clarification or have any questions.
Building a PC is a rewarding experience. You can find several tutorials online for the installation of all the components. You can also seek professional assistance if you feel like you need help. Take your time and build your PC properly and ensure that everything is seated properly and all the cables are connected.
Building a PC can be a challenging task for a beginner, but it’s not impossible. With the right guidance and resources, anyone can learn how to assemble a computer from scratch.
Yes, you can pay someone to assemble your PC. There are many computer stores, online retailers, and independent contractors who offer PC building services. Some stores even offer these services for free if you purchase all the components from them.
Yes, it is possible to build a PC with no prior experience. However, it requires a bit of research, patience, and attention to detail.
I am a PC enthusiast with a passion for gaming and all things tech. With years of experience building and customizing PCs, I have become a go-to source for PC case reviews and gaming insights. I am dedicated to researching and writing about the latest trends and developments in the PC gaming industry, with a particular focus on PC cases. From budget-friendly options to high-end builds, I have the expertise to guide you through the process of selecting the perfect case for your needs. Whether you’re a beginner or a seasoned pro, my in-depth reviews and practical tips will help you make an informed decision.